


Use Ionic with Vite, Vue 3, WindiCSS, and unplugin
Introduction
Ionic is a powerful tool that can help you create cross-platform mobile applications using your favorite javascript front-end framework. In my case, I am not very familiar with mobile development, as I'm rather a full-stack developer working daily with .NET and Vue.js. That's why I was very happy when I saw such a framework, allowing me to only focus on developing my application, with very few new learnings.
Starting with Vue
As mentioned earlier, Ionic allows a developer to use Angular, React, or Vue to develop their applications. In our case, we'll be focusing on Vue.
The first impressions are good, Ionic supports the latest Vue version (Vue 3.2), the documentation looks very complete and the gallery photos example is very clean and demonstrative. However, if you look closer you'll see some imperfections :
- It's not using the composition API with the setup syntax
- It's still using the VueCLI, which is no longer recommended in favor of Vite
- Ionics provides custom theming tools in CSS (which to be honest look very good, especially the dark mode management), and you might want to reuse the syntax of Tailwind or Windi.
The first point is not very relevant, as it firstly depends on your coding style (both syntaxes are working and will be supported in the future) and then the boilerplate generated by Ionic and the VueCLI only creates 2 or 3 components.
The second point is more detrimental as the efficiency of Vite is not to be demonstrated anymore, almost all frameworks migrated to it. On top of that, for those who've been using it with Vue.js and who know antfu, you might want to add some of its amazing unplugin packages.
At the time of writing this, I was quite surprised to not find too many guides, tutorials, or documentation related to this, so I decided to write my own!
Let's setup our projet
Generate Ionic's Vue boilerplate
First, we'll start with the template generated by the CLI, to have a common starting point.
Make sure you have the ionic CLI installed,
npm install -g @ionic/cli@latest
and generated the boilerplate. For this example, I'll be using the blank starter, but you can adjust everything with others.
ionic start myApp blank --type vue
Ok so now you have a working application, you can check it in your browser if you want.
Add Vite
Alright, so now that we have a working application, we will replace the VueCLI with Vite.
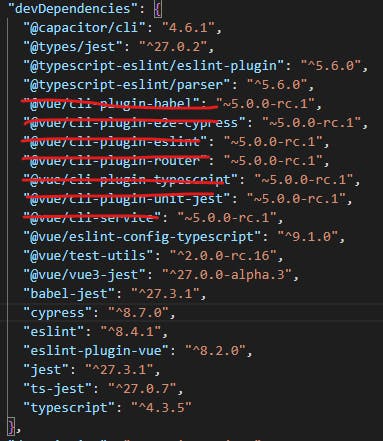
- First, let's remove all the packages and dependencies related to the VueCLI in our package.json :
- install the new packages :
npm i vite vue-tsc @vitejs/plugin-vue
- replace the types value with "node" in tsconfig.json
- add a vite.config.ts to the root folder of your application :
import { defineConfig } from "vite";
import vue from "@vitejs/plugin-vue";

export default defineConfig({
  plugins: [vue()],
});
As mentioned in Vite's documentation, it needs an index.html acting as an entry point for the tool. So let's create one in the root folder, referencing of course our main.ts :
<!DOCTYPE html>
<html lang="en">
  <head>
    <meta charset="UTF-8" />
    <meta http-equiv="X-UA-Compatible" content="IE=edge" />
    <meta name="viewport" content="width=device-width, initial-scale=1.0" />
    <title>Document</title>
  </head>
  <body>
    <div id="app"></div>
    <script type="module" src="/src/main.ts"></script>
  </body>
</html>
Finally, update your scripts commands in your package.json :
  "scripts": {
    "dev": "vite dev",
    "build": "vue-tsc --noEmit && vite build"
  },
NB: you'll see that the following error occurs when you run your app
 That's because the process.env.BASE_URl variable in the src/router/index.ts is no longer handled as Vite exposes its own variables. You can either remove this argument from the createWebHistory method or replace it with the correct vite's variable.
Add WindiCSS
Now that we have our application running with Vite, let's add WindiCSS to get more styling options than those provided by Ionic (or if you are like me more used to the class syntax than pure css :D).
Just run this command to install everything needed :
npm i -D vite-plugin-windicss windicss
Then we'll just follow Windi's documentation :
- add the plugin to your Vite's config :
import WindiCSS from "vite-plugin-windicss";

export default {
  plugins: [WindiCSS()],
};
- import the styles files in your main.ts :
import "virtual:windi.css";
And we should be good! We can try to add this to test is :
<div class="text-red-500">This text should be red</div>
Bonuses
For those who like me have been working with Vue and who've discovered antfu and its incredible contributions to the community, you'll probably want to add unplugin-vue-components, unplugin-auto-import, or unplugin-icons. Let's add all of them :
unplugin-vue-components
Run
npm i unplugin-vue-components -D
and update your vite config.
Here's the configuration I use for my projects, but you can customize everything according to your needs (just take a look at the documentation) :
import { defineConfig } from "vite";
import vue from "@vitejs/plugin-vue";
import WindiCSS from 'vite-plugin-windicss'
import Components from "unplugin-vue-components/vite";

export default defineConfig({
    plugins: [vue(), WindiCSS(), Components({
        dts: true,
        extensions: ["vue"],
        dirs: ["./src"],
        deep: true,
        directoryAsNamespace: false,
    })]
})
unplugin-auto-import
Run
npm i -D unplugin-auto-import
Update your vite configuration :
import { defineConfig } from "vite";
import vue from "@vitejs/plugin-vue";
import WindiCSS from 'vite-plugin-windicss'
import AutoImport from 'unplugin-auto-import/vite'

export default defineConfig({
    plugins: [vue(), WindiCSS(), AutoImport({
        imports: ["vue"],
        dts: "./auto-imports.d.ts",
        vueTemplate: true,
        eslintrc: {
            enabled: true,
            filepath: "./.eslintrc-auto-import.json",
            globalsPropValue: true,
        },
    })]
})
Again, that's the one I'm using, but you can customize yours here
More packages
If you want, you can also add unplugin-icons, but Ionic provides its own icons, so I recommend having a look here first. Or to stay in antfu's work, we can also mention vitest, which is a really good successor to Jest. If you appreciated migrating from Webpack to Vite, you'll love it.
Conclusion
All that being said, I think we're done. You'll find the template here. Please do not hesitate to leave a comment, a remark or a suggestion